Planning to install an in-ground dog fence and wondering what you’ll need? In this article, we’ll cover the different types of underground dog fence installation tools for different yards and setups.
- Small Yard Tools – Flat-bladed spade, Waterproof Splicing Kits
- Large Yard Tools – Trencher (rented or purchased), Waterproof Splicing Kits
- For Crossing Sidewalks and Driveways – Trowel (when using expansion joints), Skillsaw (for cutting a new path), caulk, [optional – walkway tunnel kit to bore under path]
Note: If you click some of the links in this article we may earn a small commission at no additional cost to you.
Table of Contents
- Low Cost Tools For Small Yards
- Underground Fence Kit (transmitter, underground dog fence thick gauge wire, flags, and receiver collar)
- Waterproof Underground Splicing Kits
- Flat Bladed Spade
- Faster Tools For Large Yards
- Tools For Driveways And Sidewalks
- How To Install An Underground Dog Fence Line
- Step 1 – Choose A Layout
- Step 2 – Calculate How Much Boundary Wire
- Step 3 – Decide The Method To Cross Driveways And Sidewalks
- Step 4 – Get An Underground Fence Kit With Thick Gauge Wire
- Step 5 – Get Additional Tools
- Step 6 – Layout the Dog Fence Wire
- Step 7 – Plugin the Transmitter and Activate the Dog Fence Wire
- Step 8 – Charge the Receiver Collar and Turn On
- Step 9 – Test the Boundary Wire
- Step 10 – Install the Wire Using the Tools Discussed Above
- Step 11 – Use Flags to Mark Boundary
- Step 12 – Train Your Dog
- FAQ
- How Deep Do I Have To Bury The Dog Fence Wire?
- Can I Bury The Dog Fence Wire Across A Utility Line?
- Can We Install Some Dog Fence Wire Above Ground And Bury The Rest?
- Can I Run The Dog Fence Cable Through A Culvert Or Drainage Ditch?
Low Cost Tools For Small Yards
For small yards you’ll only need the following tools:
Underground Fence Kit (transmitter, underground dog fence thick gauge wire, flags, and receiver collar)
Waterproof Underground Splicing Kits
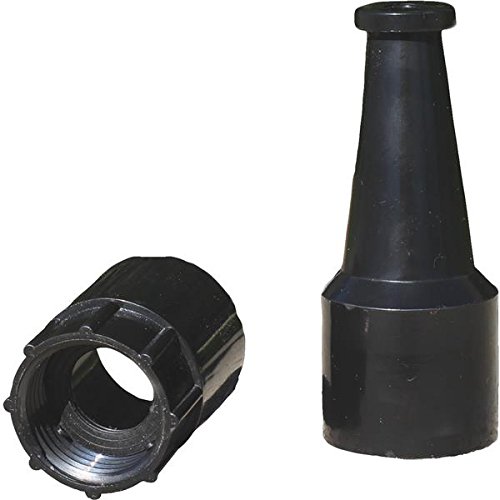
Note that most kits come with splicing kits. It’s best to use waterproof ones like the example below. Make sure they work for the gauge wire you’ll be using.
Flat Bladed Spade
Use this to dig and 2-3 inch deep line. Bury the dog fence wire no more than 3 inches deep so you maintain a good signal while protecting the dog fence wire from vehicle traffic, lawnmowers, and animals.
Faster Tools For Large Yards
For larger yards, a spade can get pretty tedious. It works but it’ll be faster to rent or buy a gas-powered trencher.
You can even use an electric trencher to speed things up for small yards.

Tools For Driveways And Sidewalks
If you plan on using an existing expansion joint all you’ll need is a garden trowel or knife to cut out the existing caulk or junk in the joint. Lay down the dog fence wire then cover again with caulk.
If the joint isn’t large enough you may need to use a circular saw with a masonry blade to widen the joint or cut a new one.
You can also tunnel under the driveway if you don’t want to cut it. For that, you’ll need some 1″ PVC pipe, a garden hose, and a walkway tunnel kit. We recommended using a water drill as discussed in our article to make the cut under the driveway easier.
How To Install An Underground Dog Fence Line
Watch the video below for a quick overview of the steps you’ll need to go through. This video assumes a small yard. Hence it only uses a flat-bladed spade for the installation.
Get Our #1 Easy, Homemade Dog Food Recipe (Vet-Approved), 100% Free!!! Click to get it NOW!
For larger yards, we recommend buying or renting a trenching tool.
Step 1 – Choose A Layout
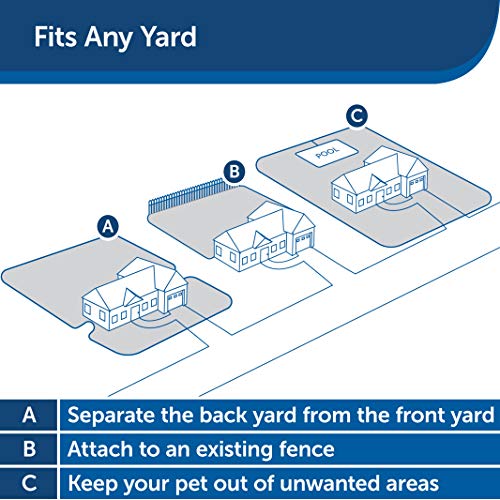
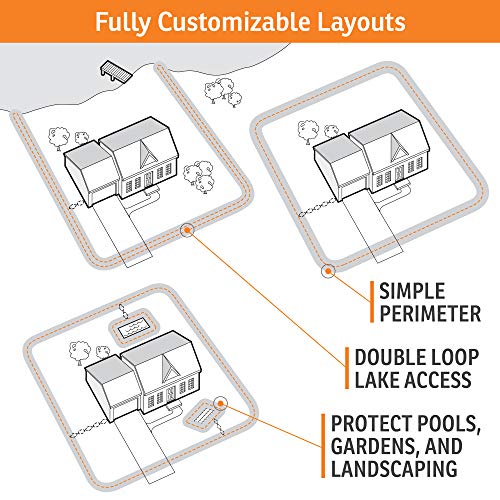
The most basic layout is one where you have a single boundary wire going around your yard. The beauty of an underground fence though is that you can use it in so many ways.
With the double loop layout, you can block off areas you want to protect like a pool or garden. We discuss this strategy in-depth in our article on the double loop method.
Step 2 – Calculate How Much Boundary Wire
Once you’ve decided on a layout you’ll need to calculate how many linear feet of dog fence wire you’ll need.
Don’t just buy a kit based on the acreage of your property. They may give you too much or too little boundary wire for what you’re trying to do.
Instead, use a tool like Google Earth to draw the boundary line and calculate its length. Here are the basic steps:
- Download google earth pro.
- Use the search function to go to your address.
- Use the path/line function to draw a line where you plan to install the underground fence.
- Right click on the line and go to properties.
- Click the measurements tab and use the drop down to measure feet.
- Use that total measurement as an estimate of how much boundary wire you’ll need. Be sure to buy an extra 100 feet or so as google earth won’t be as accurate as measuring it in the field.
- Watch the two videos below.
How to Draw a Line in Google Earth Pro
Use this to draw your underground fence layout.
Measure the Length of the Line in Google Earth Pro
Step 3 – Decide The Method To Cross Driveways And Sidewalks
Crossing driveways can be easy or it can be pretty labor-intensive. If you need to tunnel under it then plan on a few hours of work and some specialized tools.
We cover all the tools needed as well as the how-to in this article on crossing driveways with an in-ground electric dog fence.
Get Our #1 Easy, Homemade Dog Food Recipe (Vet-Approved), 100% Free!!! Click to get it NOW!
We’ll repeat the tools you need for the specific type of crossing below. Use the article above to decide how you plan to cross the driveway. The most commons methods and tools are discussed below:
- Using an Existing Expansion Joint
- Cutting a New Expansion Joint or Slot
- Tunneling Under a Stone Driveway or Driveway You Don’t Want to Cut
Step 4 – Get An Underground Fence Kit With Thick Gauge Wire
Next, you’ll need to purchase an underground fence kit and enough boundary wire based on the layout you’ve chosen previously.
We recommend 14 gauge dog fence wire kits as they will last longer underground. Extreme Electric Dog Fence is one brand that uses thicker gauge dog fence wire in its kits.
You can also buy additional spools of 14 gauge solid copper dog fence wire with underground splicing kits to extend the line.
Step 5 – Get Additional Tools
Low Cost Tools For Small Yards
For small yards you’ll only need the following tools:
Underground Fence Kit (transmitter, underground dog fence thick gauge wire, flags, and receiver collar)
Waterproof Underground Splicing Kits
Note that most kits come with splicing kits. It’s best to use waterproof ones like the example below. Make sure they work for the gauge wire you’ll be using.
Flat Bladed Spade
Use this to dig and 2-3 inch deep line. Bury the dog fence wire no more than 3 inches deep so you maintain a good signal while protecting the dog fence wire from vehicle traffic, lawnmowers, and animals.
Faster Tools For Large Yards
For larger yards, a spade can get pretty tedious. It works but it’ll be faster to rent or buy a gas-powered trencher.
You can even use an electric trencher to speed things up for small yards.
Get Our #1 Easy, Homemade Dog Food Recipe (Vet-Approved), 100% Free!!! Click to get it NOW!

Tools For Driveways And Sidewalks
If you plan on using an existing expansion joint all you’ll need is a garden trowel or knife to cut out the existing caulk or junk in the joint. Lay down the dog fence wire then cover again with caulk.
If the joint isn’t large enough you may need to use a circular saw with a masonry blade to widen the joint or cut a new one.
You can also tunnel under the driveway if you don’t want to cut it. For that, you’ll need some 1″ PVC pipe, a garden hose, and a walkway tunnel kit. We recommended using a water drill as discussed in our article to make the cut under the driveway easier.
Step 6 – Layout the Dog Fence Wire
Before you start trenching or digging go ahead and test the system. Always do this before digging. You want to check for weak spots or interference. Examples include underground cable TV lines or another metal conduit that can short circuit or weaken the signal.
Step 7 – Plugin the Transmitter and Activate the Dog Fence Wire
Once you’ve laid out the wire connect it to the transmitter. Plugin the transmitter and turn it on to activate your underground electric dog fence.
Step 8 – Charge the Receiver Collar and Turn On
Install the batteries on the receiver collar and charge it up if necessary.
Turn it on and walk the boundary line to test it.
Step 9 – Test the Boundary Wire
Test the boundary line by approaching it and walking away along the entire length. Confirm the receiver collar is working at all areas of the boundary line.
Step 10 – Install the Wire Using the Tools Discussed Above
Once the test passes it’s time to start digging and installing the underground dog fence wire. Use either the spade mentioned above or one of the trenchers. Renting or buying a trencher will speed things up a bit.
Get Our #1 Easy, Homemade Dog Food Recipe (Vet-Approved), 100% Free!!! Click to get it NOW!
Step 11 – Use Flags to Mark Boundary
Mark the boundary with the kit’s included flags or get some lawn flags as needed. You’ll need this for training.
Step 12 – Train Your Dog
Learn how to train your dog on an underground electric dog fence. Then plan to spend a good week or two training them on what the receiver collar means and where the boundary is.
FAQ
How Deep Do I Have To Bury The Dog Fence Wire?
Bury the dog fence wire 2-3 inches deep to prevent your dog from chewing on it and to protect it from vehicle traffic and lawnmowers.
When tunneling under a driveway, don’t go deeper than 3-4 inches. That will maintain the signal and prevent it from being blocked by the soil and concrete above.
Can I Bury The Dog Fence Wire Across A Utility Line?
Yes. Most utility lines are deep enough that they won’t short circuit or interfere with the signal. This is another reason to only bury the line 2-3 inches deep and to test it above ground before digging it in.
If you think you’re getting short-circuiting see our article on how to handle cable TV lines here.
Can We Install Some Dog Fence Wire Above Ground And Bury The Rest?
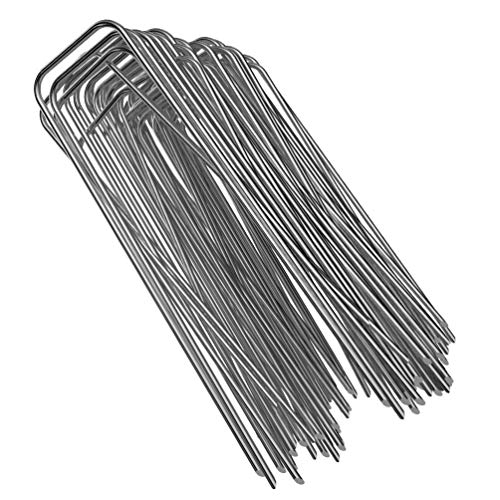
You don’t have to bury any of the dog fence wire. You can use simple garden stakes and leave them at the surface. Just be cautious not to cut it while mowing the lawn. Also, check that your dog or other animals don’t chew on it.
Can I Run The Dog Fence Cable Through A Culvert Or Drainage Ditch?
Yes, however, if the culvert or drainage pipe is made of metal it could interfere with the signal. Run the dog fence wire through and test it before using this path as part of your final installation.
My name is Ken and I’m one of the staff writers at Petloverguy.com. I’ve cared for pets most of my life starting with hamsters, turtles, and snakes. Then moving up to parakeets, guinea pigs, and even ducks.
I currently live with two yorkies and a chihuahua mix.
Get Our #1 Easy, Homemade Dog Food Recipe (Vet-Approved), 100% Free!!! Click to get it NOW!


